
Yeast Starter
Overview
Making a yeast starter requires minimal effort and just a little forethought. Getting a population of yeast started prior to brewing goes a long way to produce reliable fermentation and reliable beer. Healthy yeast in large numbers reduce the chance of off-flavors from contaminating microorganisms, ensure a quick start to fermentation, and help speed fermentation in terms of both attenuation and aging-out of yeast byproducts. Starters are especially helpful for higher gravity beers and lagers.
Recipe
- 4 cups water
- 1/2 cup DME
- yeast
Before you brew (ideally a couple of days).
- Remove yeast from refrigerator
- Mix DME and water in a small pot
- Heat to a boil uncovered (watch for boil-overs)
- Boil for 10 minutes (only cover for the last few minutes to sanitize the lid with steam)
- Leave pot undisturbed until cooled to room temperature
- Sanitize a small container with an airlock and the outside of yeast packaging
- Mix DME solution and yeast in sanitized container and cap with airlock
- Leave container at room temperature until pitching yeast on brew day
 |
Figure 1: If using liquid yeast, first remove it from the refrigerator to allow it to warm to room temperature. Measure out water and DME. |
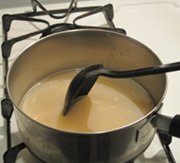 |
Figure 2: Stir the DME into the water a little at a time and breakup any clumps until it is completely disolved. If you like, you can carefully add some heat while you mix. |
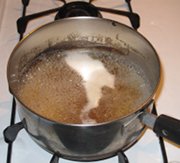 |
Figure 3: Bring the solution to a boil uncovered. The DME solution will have an exceptional tendency to boil over. Watch it carefully so you can lift it off the stove quickly if needed. |
 |
Figure 4: Reduce the heat slighly and maintain boiling for 10 minutes. For the last couple minutes put the lid on the pot so that the steam can sanitize the lid. |
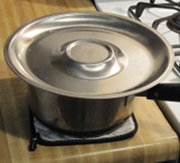 |
Figure 5: Set the pot aside somewhere where it will remain undisturbed. It needs to cool to less than about 80 degrees Fahrenheit to be safe to add the yeast. |
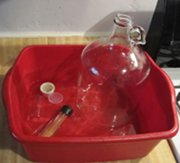 |
Figure 6: Sanitize everything that will touch the yeast and DME solution. A small container to hold the fermenting starter (a growler works well), an airlock to seal this container, the outside of the yeast packaging, scissors to open the packaging, a funnel if you will use one. |
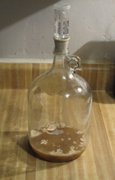 |
Figure 7: Mix the yeast with the DME solution in the container. Seal the container with the airlock. Set this aside for about a day or ideally two. Finally you will add the contents of the starter to cooled wort to begin fermentation into beer. |
Variations
The basic plan is to make a sanitized DME and water solution and mix it with the yeast inside a sanitize container. Then to give it time for the yeast cells to multiply and prepare for fermentation. However there is still plenty of room for variation and experimentation on that theme. For example, you might want to add a couple of hop pelets to the boiling solution as an additional precaution against infection.
Yeast Source and Form
Yeast is available in a few different forms and packaging. The pictures above show a tube of liquid yeast, but the procedure would be very much the same if you are using a packet of dry yeast or a pouch of liquid yeast. Reusing and cultivating yeast is a more advanced topic that will hopefully be covered in a later article.
One notable variation is the Wyeast Laboratories "smack-pack" that is meant to get the yeast started inside the pouch before you open it.[2] This could in theory make a yeast starter redundant, but in practice there are a number of reasons you might want to use a starter anyway. You may wish to grow up a larger number of yeast cells or let the starter go for a longer time than is intended with the "smack-pack". You could either activate the "smack-pack" and later pitch it into your starter or add it to the starter without activating like any other liquid yeast. The former is more time intensive but possibly reduces the risk of contamination. However if your sanitation is that bad you have bigger issues, so it shouldn't mater that much.
Cooling
There are a number of options for cooling the solution at the end. You could set the pot aside in the refrigerator or freezer. You could make an ice bath to cool the pot. You could leave the pot out on your deck or in a snowbank weather permitting. While any temperature above freezing and below 80F should not kill the yeast it is possible to temperature shock yeast with big abrupt temperature changes. One option to avoid this is to keep the yeast cool in the refrigerator before mixing it with a refrigerator temperature DME solution, and then allowing both to slowly rise to room temperature outside the refrigerator.
Timing
The airlock on the starter should start bubbling within about 12 hours. After a few days of active fermentation the starter will stop producing much activity in the airlock. At this point the yeast have consumed much of the available sugars and are slowing their metabolic activity. If your use for the starter is delayed further the starter can be stored in the refrigerator for a week or more at this point.
Cell Count
The number of yeast cells in the starter can be increased futher by adding more DME solution after fermentation appears to slow.
References
- Palmer, John. "6.5 Preparing Yeast and Yeast Starters" How to Brew. Retrieved 2012-09-26. http://www.howtobrew.com/section1/chapter6-5.html
- ^ Wyeast Laboratories. "Direct Pitch Activator." Retrieved 2012-09-26. http://www.wyeastlab.com/hb_productdetail.cfm?ProductID=16
- White and Zainasheff. 2010. Yeast: The Practical Guide to Beer Fermentation. Boulder: Brewer's Publications.